Prusa Mendel Operators Log
From HacDC Wiki
When you use the Prusa Mendel, please add notes here. Newest at top.
- No one is at fault for the gear failure. Occurred due to unusual slippage of stepper motor faceplate mounting screws, and subsequent poor contact between gears. Easily repaired by printing new gears. Printer will be operational again in a few days. (mirage335 2013-04-10)
- Started to print again after previous issue, and about 30 minutes in drive gear for the extruder chipped, resulting in flecks of red plastic. This led to the larger extruder gear skipping and making a clicking noise. I was able to pause the printer within a few seconds of this occurring. The drive gear now appears damaged and the teeth-skipping problem persists. Settings at the time were 50mm/min. feed rate, recommended slid3r profiles, 175*C extruder temperature, green PLA, 45*C bed temperature. The print was progressing as expected up until that point. (plasma_ 2013-04-07)
- (warning, newbie response) Maybe 50mm/min at 175C is a bit much? I was using 40mm/min at 185C without problems. Do we have a table of temperature versus feedrate for PLA somewhere? (gatohaus, 2013-04-08)
- Started a print of my own case. With help from eryc and haxwithaxe on IRC, discovered that the fans were causing rippling. Also noted that the PLA is low. Replaced white PLA spool with green. (plasma_ 2013-04-07)
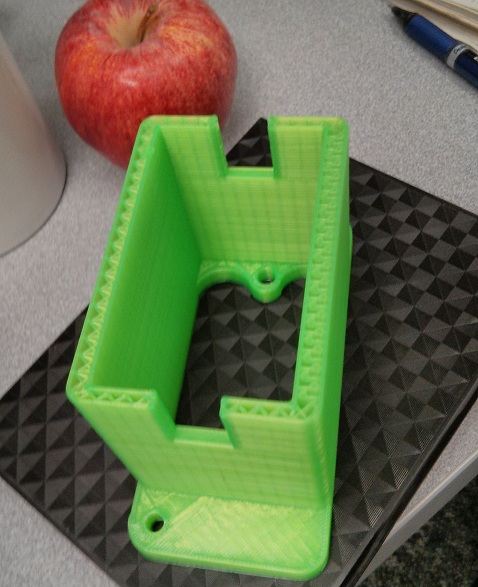
- Printed first piece of my own design. (filter holder for a spectrometer) Printer worked well. Had minor non-stick problem on first layer, but nothing significant. (gatohaus 2013-03-17)
Check whether extruder is sufficiently close to polycarbonate bed. If all else fails (or you don't mind the extra work), just use paper tape. (mirage335)
- Thanks. And after inspecting the piece and reinspecting the model, I found something I don't understand. The top slots were supposed to be 14mm wide, but they're 11mm. All other dimensions came out fine. I re-checked the model and the STL file in 2 programs, all show the slot as 14mm wide. ??? (gatohaus)
- Thanks. And after inspecting the piece and reinspecting the model, I found something I don't understand.

Slic3r sometimes creates perimeters inwards, changing the dimensions of such gaps. The best way to solve this is to adjust the model. If that is not an option, you can reduce "Vertical shells -> Perimeters" to 1, reducing the error. Failing that, printing "Robust" will use no perimeters and solid infill - at the cost of extreme plastic consumption. (mirage335)
- Printer has been working quite well again for a while now. (mirage335, 2013-03-11)
- Been a while. Attempted to print an untested guitar pick model on poly bed, it failed. Switched to trying the old reliable dodecahedron, but it failed similarly. The nozzle was draggin trhough the layers and smushing everything around. Had a print head/print bed collision that unseated the z axis from it's nuts, attempted to re-level the z axis, and I think I did ok. Switched to glass bed, and definitely had less squishing, but the first layer wouldn't stick... I need help. (xaqrox, 2013-02-18)
Sounds like you successfully dealt with some print depth issues and then switched to glass bed. However, the glass bed is finicky about cleanliness, so try again with the polycarbonate bed. Failing that, try paper tape on the polycarbonate bed. (mirage335)
- New software load added to dedicated laptop. Wiki and machinery fully harmonized, efficiency and performance maximized. (mirage335, 2013-02-11)
- Found PSU switched on. (mirage335, 2013-02-07)
- Printed part of an earbud holder. Print quality was great--no problems at all. (myersjustinc, 2013-02-04)
- Proper spool mounting system and Z-axis constraints added. Print quality vastly improved. (mirage335, 2013-02-04)
- Attempted to print UCK (universal connector kit) lego to krinkle block adapter with great difficulty due to stl weirdness. printed a whistle instead. it was uneventful. i had the fans peeled back though so i got a bit of droop on the primary hole and the speed (what was it) was a bit fast so it wasn't very tight. (haxwithaxe, 2012-01-23)
- Some problems may be ambient temperature related. When the room is 52F (11C), plastic curling, extruder jams, and Z-axis endstop malfunction are more likely. Placing a space heater on medium heat (~750W) at least four feet from the RepRap helps. Usual concerns about space heaters apply, be safe. (mirage335, 12-31-2012)
- Found loose bolts on end stops. Tightening the bolts and greasing part of the Z-axis endstop switch resolved previously mentioned homing issue. (mirage335, 12-28-2012)
- Machine needed grease. Donated officially recommended grease. Re-greased linear bearings and Z-axis threaded rods. (mirage335, 12-24-2012)
- Z-axis end stop occasionally deviates from its typical 'double click' homing. This puts it too far above the printbed. Fortunately, this occurs rarely, and may be a software glitch. The workaround is to restart the print job until it works correctly. (mirage335, 12-23-2012)
- Polycarbonate beds provided for RepRap. Glass bed still available. First layer adhesion vastly improved, bed leveling issues now far less critical. Enables easy printing of large (180x180mm) parts. Spare polycarbonate beds are exist, so users need not be too concerned about fouling. Paper tape may be used if necessary. (mirage335)
- Thin paper provided for leveling. Place small strips under print bed to adjust height. (mirage335)
- Existing power supply spontaneously failed in the middle of a job. Cautiously wired up new ATX 12V power supply, with help from juri_ . Also added 120mm fans, with cable ties (semi-permanent attachment) and gator clamps (to allow swinging the fans out of the way). Finally, achieved successful bridge tests, finding lower extrusion temperatures (165C vs 185C) improved print quality. (mirage335, 11-19-2012)
- A user found the PLA filament almost entirely used up.
- The Z-axis endstop has been moving slightly downward every time it is used. (mirage335)
- Found printer bed deleveled again. Releveled, and now machine is happy-go-lucky. (mirage335)
- Found the glass detached from the heater bed, Z-axis badly askew, and Z-axis end-stop repositioned. Performance degraded to worse than the old makerbot, but was repaired after much wasted plastic and lost time. Also added paper tape to front of printing bed for safety. (mirage335, 9-23-2012)
- Vastly better printing than makerbot. High precision, fast, easy to use, configurable. Extreme objects were tested successfully. (mirage335)
Most minor glitches were on account of provided USB fan. Overhang is best reduced by filleting[1] sharp edges and placing fan a few inches from to printer. However, strong wind may cause unusually tall and thin parts (ie. pencil-like) to print crooked; the fan should be placed at least a foot away in these cases. Fan itself should be externally powered, unplugging it from the laptop USB port disconnects the printer. Unplugging other devices (USB sticks) has no effect. Fan must rest on high-friction (eg. rubber) surface, or will slowly blow itself away. (mirage335, 9-15-2012)