Prusa Mendel Operators Log: Difference between revisions
From HacDC Wiki
No edit summary |
No edit summary |
||
| Line 1: | Line 1: | ||
[[Category:PrusaMendel]] | [[Category:PrusaMendel]] | ||
'''When you use the Prusa Mendel, please add notes here. Newest at top.''' | '''When you use the Prusa Mendel, please add notes here. Newest at top.''' | ||
* Someone successfully printed a new X-axis supporting bracket, apparently having zip-tied and hot-glued the current brackets together among other things. Unfortunately, it seems they did so with 25% infill, which is not going to result in a more stable machine. [[User:Mirage335|Mirage335]] ([[User talk:Mirage335|talk]]) 06:47, 19 April 2014 (PDT) | |||
* Now the other X-axis supporting bracket has failed, spontaneously while the printer was completely idle. Clearly, we would be looking at major repairs to bring this printer back to fully operational status. Fortunately, that should not be necessary. [[User:Mirage335|Mirage335]] ([[User talk:Mirage335|talk]]) 22:28, 8 April 2014 (PDT) | * Now the other X-axis supporting bracket has failed, spontaneously while the printer was completely idle. Clearly, we would be looking at major repairs to bring this printer back to fully operational status. Fortunately, that should not be necessary. [[User:Mirage335|Mirage335]] ([[User talk:Mirage335|talk]]) 22:28, 8 April 2014 (PDT) | ||
Revision as of 13:47, 19 April 2014
When you use the Prusa Mendel, please add notes here. Newest at top.
- Someone successfully printed a new X-axis supporting bracket, apparently having zip-tied and hot-glued the current brackets together among other things. Unfortunately, it seems they did so with 25% infill, which is not going to result in a more stable machine. Mirage335 (talk) 06:47, 19 April 2014 (PDT)
- Now the other X-axis supporting bracket has failed, spontaneously while the printer was completely idle. Clearly, we would be looking at major repairs to bring this printer back to fully operational status. Fortunately, that should not be necessary. Mirage335 (talk) 22:28, 8 April 2014 (PDT)
- For TCO accounting purposes, I am noting an estimate of 300 hours highly skilled labor, including substantial planning and innovation, while maintaining this machine. Additionally, the initial cost was ~$600, at least $100 in replacement parts has been spent, and a few hundred dollars of filament has been consumed. Mirage335 (talk)
- X-Axis supporting bracket has failed, almost catastrophically. The hot glue and zip tie presently holding the assembly together might fail at at any time. Black colored replacement part may be in the basement, as part of a former Prusa Mendel build project. Also, Z-axis left coupling spring has been badly overexpanded. Mirage335 (talk) 13:19, 28 March 2014 (PDT)
- The black PLA currently spooled up on the machine needs 180C to print well. (Zack, 2014-03-28)
- An extruder mount bolt came loose and fell out. I replaced it and luckily it happened early in my print, so not much work lost. Looking at the extruder mount more closely now, I think we should plan on replacing it in the near future, it's bowed out and the mounting bracket isn't really a great design, leading me to believe this will happen more frequently the more the bracket is deformed. (Zack, 2014-03-20)
- I've installed an 8GB uSD card into the Melzi. Apparently the firmware was compiled with support for it! Also switched the power jumper from USB to the main supply. This means that compy crashes will no longer take the printer out. I also upgraded the printer compy with a donated computer from my former company, now a triple core AMD with 8GB, so slicing now doesn't take hours and hours. The machine is running Xubuntu 64bit and appears to be relatively stable, though I do not recommend printing directly from it now we've got uSD working. (Zack, 2014-03-19)
- Thanks for the update. For a mechanical part like that, "Quality" was appropriate. FYI, "Cheap" parts are now just as aesthetically beautiful, but use less and simpler infill to print much faster. Also, uploaded relevant custom hardware files to github . With that, the essential modifications to HacDC's printer are now fully documented. Mirage335 (talk) 18:33, 18 January 2014 (PST)
- Printed a piece for my Printrbot's new extruder, and all went well. Forgot just how long the "Quality" setting takes, but I had the time to spare. (myersjustinc, 2014-01-13)
- Printer returned yesterday. Applied new double pane glass, alignment is excellent. This means good adhesion across the entire print surface and high resolution output. Also, support material has been configured and tested, enable as necessary. Mirage335 (talk) 13:10, 5 January 2014 (PST)
- New version of pronterface seems to be helping with the crashing. More Slic3r fixes have improved quality for small parts. Delaying printer return until Saturday to test ABS printing, build more spare parts, enable support material, and possibly recompile firmware. Mirage335 (talk) 20:24, 1 January 2014 (PST)
- Maintenance in progress. So far, extruder has been replaced, failed wooden groovemount swapped out for a new aluminum groovemount, bed has been leveled by a printed mat, and various Slic3r tweaks have been applied. End result is vastly superior print quality, probably above what was originally achieved. Unfortunately, pronterface software is now crashing in the middle of print jobs. If this can't be fixed, new firmware will be needed to enable fully embedded printing from SD card. Mirage335 (talk) 11:31, 1 January 2014 (PST)
- Started printing an ornament, but I was silly and tried to close Slic3r while the print was going on, so the laptop (and therefore the print) hung. Wasted some time, but the print was going great until then. (myersjustinc 2013-12-16)
- Unfortunately, severe icy weather is keeping me and the filament spools away from HacDC for tomorrow. Mirage335 (talk) 18:06, 7 December 2013 (PST)
- PLA plastic filament, 2 1kg reels, will be delivered to HacDC ASAP, probably this weekend. Vastly improved replacement glass bed finished, leveled, bolted down, tested to 95C, and used to print a PLA object. Similar high-thickness polycarbonate bed also available. ABS printing should now be achievable. Additionally, a replacement polycarbonate groovemount is ready for CNC milling. The net is that Prusa Mendel should return to above factory condition performance within the week. Mirage335 (talk) 11:12, 3 December 2013 (PST)
- Pronterface has had two crashes in the middle of jobs, independent of laptop. Suspect lack of priority to be at fault, increased nice priority to compensate. PLA plastic filament is out, 2 1kg reels are on the way. ABS printing has been tested, however, the bed cannot get hot enough for the plastic to stick (80C achieved, need >105C). Replacement glass bed nearly finished, diamond cutter and dremel glass drilling tools tested successfully. Mirage335 (talk) 22:30, 25 November 2013 (PST)
- New operating system loaded onto dedicated laptop. Improved stability and speed, dual monitor support, KDE based UI (goodbye unity!) and other fixes. (mirage335 2013-10-29)
- Thank you all for putting the printer to good use. Please note the bed temperature sensor must be properly taped to the glass to work. Smoothing out the tape holding the glass bed helps too. Also, it is normal for starting temperature to be 53C or so, and decrease when fans engage. Finally, a new glass bed has been ordered to alleviate first-layer issues, which largely account for extrusion width problems. (mirage335 2013-10-15)
- Printed a simple stand with similar heated bed issues to my Aug. 14 report, but no issues at all with the resulting print. (myersjustinc 2013-09-30)
- Worked beautifully. (Rob 2013-09-06)
- I've tried several prints over the last two days, with really inconsistent results. It looks to my inexperienced eye like the flow is narrower than it should be. When I checked the Prusa Mendel manual on how to clean the nozzle, it sounded like there were a lot of ways to break it if you do it wrong, so I did not want to try. (Rob 2013-08-30)
- Worked fine; no issues. (Rob 2013-08-22)
- Worked great, but heated bed never got up to temp. (I tend to print with first-layer temps of 0 to avoid the wait, so it didn't hold me up.) Used 55 C set point, got up to 53 before I started the print, but stayed closer to 45 throughout the print itself (about 30 minutes). Otherwise fully operational. (myersjustinc 2013-08-14).
- Cautionary sign added to prevent further bed fouling incidents. Minor softload updates. Travel (non-print) speed increased, first layer extrusion increased slightly. Machine continues operating reliably, printing without user assistance. (mirage335 2013-08-03).
- Dedicated laptop softload updated (mirage335 2013-06-28).
- Old glass bed fractured. Temporarily replaced with another glass pane. Intend to replace with laser cut glass when possible. As seen here. (mirage335 2013-06-21)
- Stable. Fire-and-forget. (mirage335 2013-05-31)
- Fully operational. No known problems. (mirage335 2013-05-17)
- New hot end promptly donated by juri. Machine repaired, however, minor X-axis timing belt rubbing and Z-Axis end stop position need to be tested. (mirage335 2013-05-13)
- Bowden extruder tested, with success. However, the hot-end finally clogged, stripping the PTFE tube out of its M6 bolt clamps at the cold end. A second incident ended my patience with the bowden extruder for now. Moreover, unclogging the hot-end was not entirely successful, and that hot-end now needs replacement. (mirage335 2013-05-12)
- Replacement LM8UU bearings applied to X-Axis along with new X-carriage and zip tie X-axis belt tensioner. Performance greatly improved. Y-Axis replacement bearings will be applied soon. (mirage335 2013-05-05)
- Machine operational. Small gear deformed, due to excessive room temperature. Gear replaced, extruder motor fan added to compensate. It is now clear that all three of the recent failures responsible for downtime likely occurred due to excessive ambient temperatures. (mirage335 2013-05-03)
- New part installed. Machine operational. (mirage335 2013-05-02)
- Machine barely functional. Replacement hot-end mount needed, and already CNC milled. Installation will be done ASAP. (mirage335 2013-04-29)
- Machine functional. Still needs new software load and documentation (will be done this weekend). Use with care, and send M92 E855 for accurate extrusion. Also, more plastic as well as replacement and upgrade parts are on the way. (mirage335 2013-04-25)
- Printing new extruder has proven difficult. Borrowing machine temporarily to complete repairs in a reasonable time. ETA Thursday. (mirage335 2013-04-21)
- MACHINE NOT OPERATIONAL. New extruder must be installed and calibrated before machine can be recommissioned. Also, some of the linear bearings are badly worn, and must be replaced soon. On the upside, print bed standoffs have been eliminated in favor of rigid MDF backing. Bed leveling issues are practically eliminated. This dramatically improves print quality, reduces machine wear, and encourages newbie use (mirage335 2013-04-15).
- No one is at fault for the gear failure. Occurred due to unusual slippage of stepper motor faceplate mounting screws, and subsequent poor contact between gears. Easily repaired by printing new gears. Printer will be operational again in a few days. (mirage335 2013-04-10)
- Started to print again after previous issue, and about 30 minutes in drive gear for the extruder chipped, resulting in flecks of red plastic. This led to the larger extruder gear skipping and making a clicking noise. I was able to pause the printer within a few seconds of this occurring. The drive gear now appears damaged and the teeth-skipping problem persists. Settings at the time were 50mm/min. feed rate, recommended slid3r profiles, 175*C extruder temperature, green PLA, 45*C bed temperature. The print was progressing as expected up until that point. (plasma_ 2013-04-07)
- (warning, newbie response) Maybe 50mm/min at 175C is a bit much? I was using 40mm/min at 185C without problems. Do we have a table of temperature versus feedrate for PLA somewhere? (gatohaus, 2013-04-08)
- Started a print of my own case. With help from eryc and haxwithaxe on IRC, discovered that the fans were causing rippling. Also noted that the PLA is low. Replaced white PLA spool with green. (plasma_ 2013-04-07)
- Printed first piece of my own design. (filter holder for a spectrometer) Printer worked well. Had minor non-stick problem on first layer, but nothing significant. (gatohaus 2013-03-17)
Check whether extruder is sufficiently close to polycarbonate bed. If all else fails (or you don't mind the extra work), just use paper tape. (mirage335)
- Thanks. And after inspecting the piece and reinspecting the model, I found something I don't understand. The top slots were supposed to be 14mm wide, but they're 11mm. All other dimensions came out fine. I re-checked the model and the STL file in 2 programs, all show the slot as 14mm wide. ??? (gatohaus)
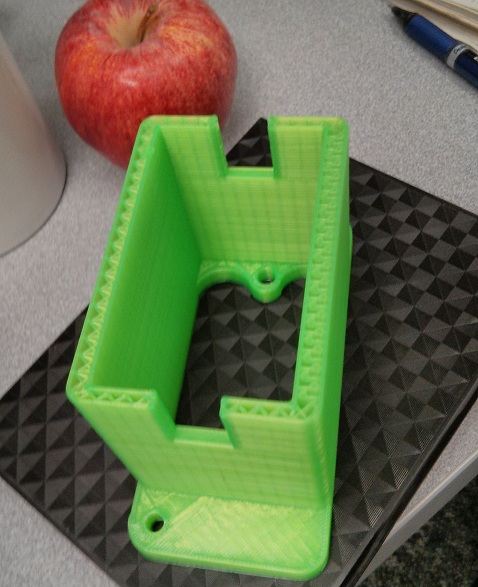
- Thanks. And after inspecting the piece and reinspecting the model, I found something I don't understand.

Slic3r sometimes creates perimeters inwards, changing the dimensions of such gaps. The best way to solve this is to adjust the model. If that is not an option, you can reduce "Vertical shells -> Perimeters" to 1, reducing the error. Failing that, printing "Robust" will use no perimeters and solid infill - at the cost of extreme plastic consumption. (mirage335)
- Printer has been working quite well again for a while now. (mirage335, 2013-03-11)
- Been a while. Attempted to print an untested guitar pick model on poly bed, it failed. Switched to trying the old reliable dodecahedron, but it failed similarly. The nozzle was draggin trhough the layers and smushing everything around. Had a print head/print bed collision that unseated the z axis from it's nuts, attempted to re-level the z axis, and I think I did ok. Switched to glass bed, and definitely had less squishing, but the first layer wouldn't stick... I need help. (xaqrox, 2013-02-18)
Sounds like you successfully dealt with some print depth issues and then switched to glass bed. However, the glass bed is finicky about cleanliness, so try again with the polycarbonate bed. Failing that, try paper tape on the polycarbonate bed. (mirage335)
- New software load added to dedicated laptop. Wiki and machinery fully harmonized, efficiency and performance maximized. (mirage335, 2013-02-11)
- Found PSU switched on. (mirage335, 2013-02-07)
- Printed part of an earbud holder. Print quality was great--no problems at all. (myersjustinc, 2013-02-04)
- Proper spool mounting system and Z-axis constraints added. Print quality vastly improved. (mirage335, 2013-02-04)
- Attempted to print UCK (universal connector kit) lego to krinkle block adapter with great difficulty due to stl weirdness. printed a whistle instead. it was uneventful. i had the fans peeled back though so i got a bit of droop on the primary hole and the speed (what was it) was a bit fast so it wasn't very tight. (haxwithaxe, 2012-01-23)
- Some problems may be ambient temperature related. When the room is 52F (11C), plastic curling, extruder jams, and Z-axis endstop malfunction are more likely. Placing a space heater on medium heat (~750W) at least four feet from the RepRap helps. Usual concerns about space heaters apply, be safe. (mirage335, 12-31-2012)
- Found loose bolts on end stops. Tightening the bolts and greasing part of the Z-axis endstop switch resolved previously mentioned homing issue. (mirage335, 12-28-2012)
- Machine needed grease. Donated officially recommended grease. Re-greased linear bearings and Z-axis threaded rods. (mirage335, 12-24-2012)
- Z-axis end stop occasionally deviates from its typical 'double click' homing. This puts it too far above the printbed. Fortunately, this occurs rarely, and may be a software glitch. The workaround is to restart the print job until it works correctly. (mirage335, 12-23-2012)
- Polycarbonate beds provided for RepRap. Glass bed still available. First layer adhesion vastly improved, bed leveling issues now far less critical. Enables easy printing of large (180x180mm) parts. Spare polycarbonate beds are exist, so users need not be too concerned about fouling. Paper tape may be used if necessary. (mirage335)
- Thin paper provided for leveling. Place small strips under print bed to adjust height. (mirage335)
- Existing power supply spontaneously failed in the middle of a job. Cautiously wired up new ATX 12V power supply, with help from juri_ . Also added 120mm fans, with cable ties (semi-permanent attachment) and gator clamps (to allow swinging the fans out of the way). Finally, achieved successful bridge tests, finding lower extrusion temperatures (165C vs 185C) improved print quality. (mirage335, 11-19-2012)
- A user found the PLA filament almost entirely used up.
- The Z-axis endstop has been moving slightly downward every time it is used. (mirage335)
- Found printer bed deleveled again. Releveled, and now machine is happy-go-lucky. (mirage335)
- Found the glass detached from the heater bed, Z-axis badly askew, and Z-axis end-stop repositioned. Performance degraded to worse than the old makerbot, but was repaired after much wasted plastic and lost time. Also added paper tape to front of printing bed for safety. (mirage335, 9-23-2012)
- Vastly better printing than makerbot. High precision, fast, easy to use, configurable. Extreme objects were tested successfully. (mirage335)
Most minor glitches were on account of provided USB fan. Overhang is best reduced by filleting[1] sharp edges and placing fan a few inches from to printer. However, strong wind may cause unusually tall and thin parts (ie. pencil-like) to print crooked; the fan should be placed at least a foot away in these cases. Fan itself should be externally powered, unplugging it from the laptop USB port disconnects the printer. Unplugging other devices (USB sticks) has no effect. Fan must rest on high-friction (eg. rubber) surface, or will slowly blow itself away. (mirage335, 9-15-2012)