Reprap: Difference between revisions
From HacDC Wiki
Hexagon5un (talk | contribs) (elliot redid the hot end, so this is no longer strictly true) |
No edit summary |
||
| (One intermediate revision by one other user not shown) | |||
| Line 1: | Line 1: | ||
'''OFFLINE''' | |||
Machine has been essentially replaced by [[PrusaMendel]]. | |||
The reprap can be found in the workshop room, on a rolly-cart. It is driven by a computer (also on the cart) named norbert (as in the angry beavers... beavers make stuff, its logical...). To use the reprap, ssh or VNC into norbert (ask Tommy for the passwd), and run skeinforge and company from there. | The reprap can be found in the workshop room, on a rolly-cart. It is driven by a computer (also on the cart) named norbert (as in the angry beavers... beavers make stuff, its logical...). To use the reprap, ssh or VNC into norbert (ask Tommy for the passwd), and run skeinforge and company from there. | ||
| Line 220: | Line 223: | ||
Copyright Note: The images on www.bobdbob.com I specifically cite in this page are released under the Attribution-Noncommercial 3.0 Unported (like this page), but the other content of that site is not. I'll be moving those images over to hacdc machines as soon as I determine /how/ to. | Copyright Note: The images on www.bobdbob.com I specifically cite in this page are released under the Attribution-Noncommercial 3.0 Unported (like this page), but the other content of that site is not. I'll be moving those images over to hacdc machines as soon as I determine /how/ to. | ||
[[Category:RepRap]] | [[Category:RepRap]] | ||
Latest revision as of 00:56, 11 March 2013
OFFLINE Machine has been essentially replaced by PrusaMendel.
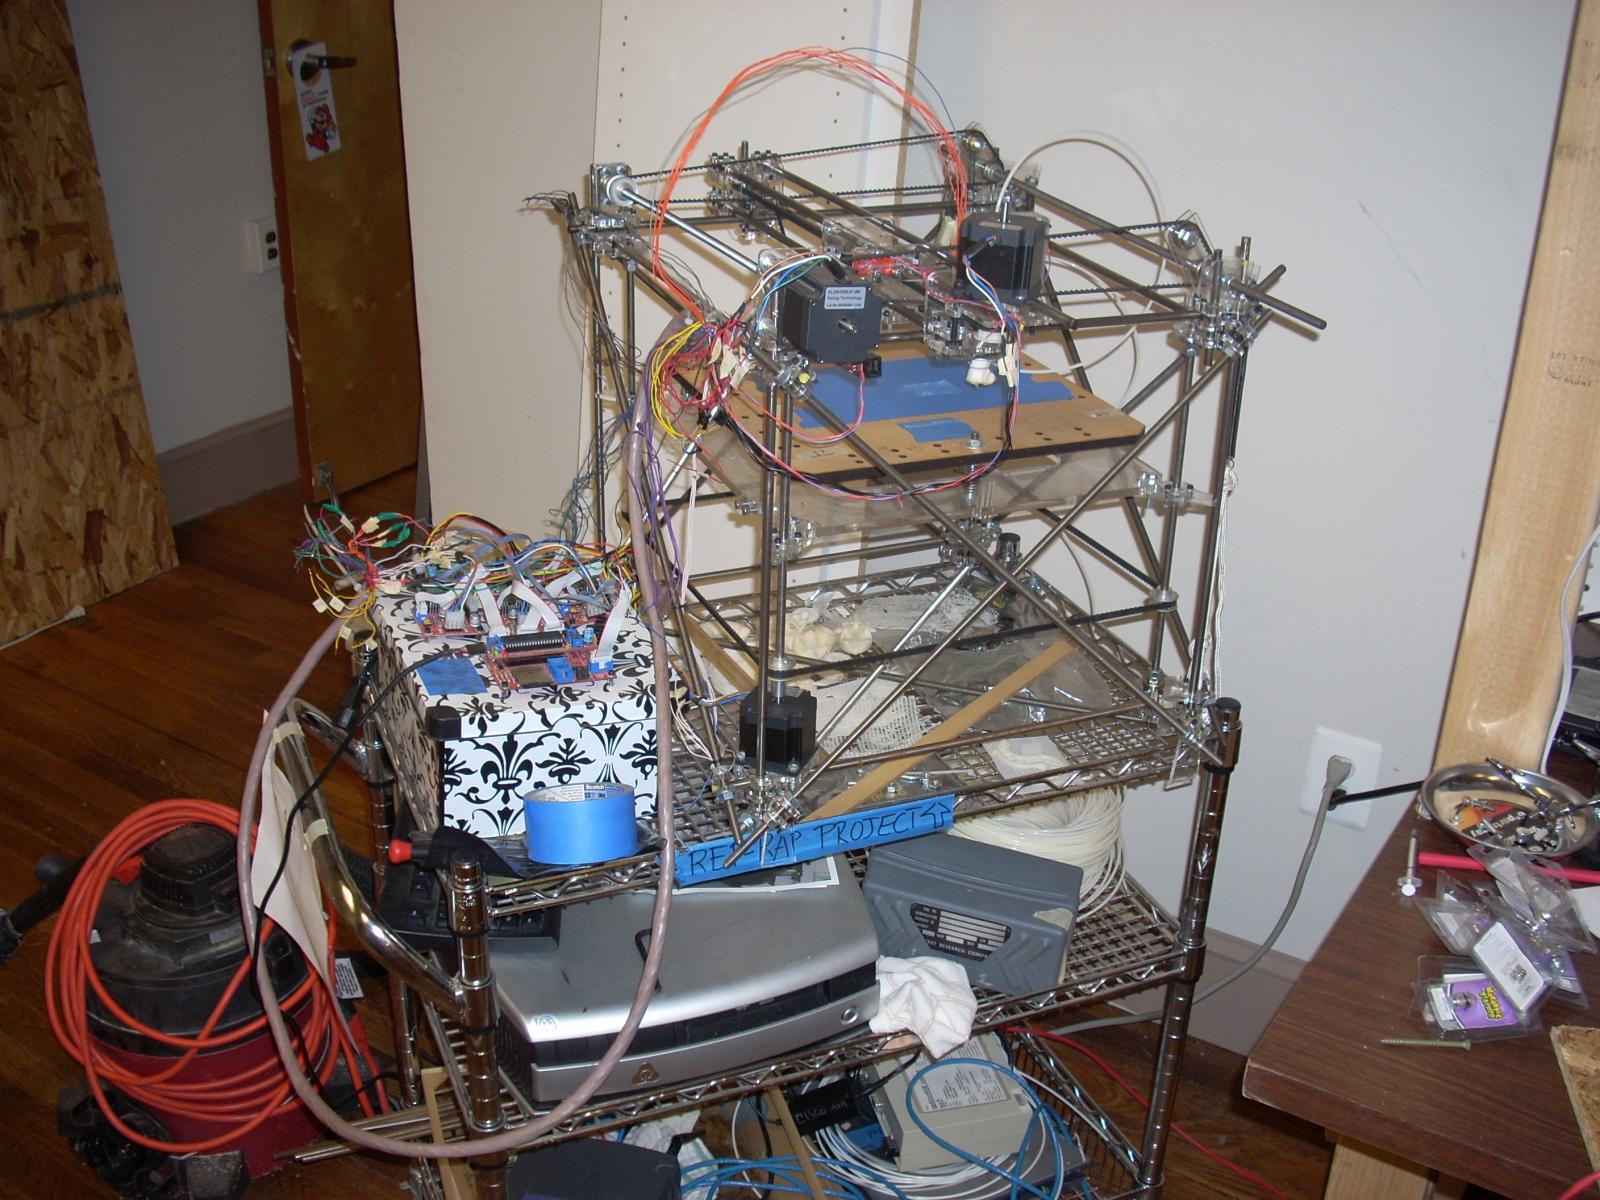
The reprap can be found in the workshop room, on a rolly-cart. It is driven by a computer (also on the cart) named norbert (as in the angry beavers... beavers make stuff, its logical...). To use the reprap, ssh or VNC into norbert (ask Tommy for the passwd), and run skeinforge and company from there.
Our reprap is unfortunately a bit of a mongrel. Its extruder is half-way between two normal versions, and I've made several small fixes trying to make it more reliable.
If you're using the RepRap, please note what you've done in the RepRap Operator's Log.
Log into norbert:
norbert is the computer under the reprap. It runs FreeBSD, and lurks on that little wired network on the cart at 192.168.0.47. Plan A is to simply connect to the VNC server at 192.168.0.47:1. Ask Tommy or Will for the passwd. Plan B, if someone has killed norbert, is to ssh in, start the VNC server, and then proceed to plan A. The vnc server can be started with " vncserver -depth 24 -geometry 1024x768"
To render an STL file to gcode:
Get your stl file onto norbert with scp or something, then type the command:
skeinforge.py foo.stl
(only use the correct filename, instead of foo.stl... It'll take a while.)
That will probably generate a file named foo_export.gcode.
You then need to run that gcode file through the correctz script.
(It will rewrite Z translations so they are only along the Z axis,
and run them in G0. This is a workaround for a bug in the firmware.)
correctz foo_export.gcode > foo.gcode
I do not recommend bringing in pre-rendered gcode, skeinforge has approximately 3 billion parameters, and I have tweaked a few of them.
The Incantation of Calibration
This procedure has been tested... but /only/ this procedure. If you try to do things out of order, all bets are off. That may involve restarting from the beginning.
Replace any mangled blue tape
The platen is covered with blue tape, to improve the plastic's ability to stick to it. Replace any excessively mangled parts. Make sure you use the right flavor of tape, there is a slightly darker much slicker blue tape which does not work.
Turn it on
Shove the extruder into the corner of the platen labeled "origin C1"
Plug the AC powerline into the box under the ardoweenie
Run reprap.kerm
Press reset on the ardoweenie.
Wait for it to say "Found it!"
There is a bit of a race condition, you may need to hit reset again. The script will keep saying "poke?" until it finds it.
You should now have a prompt which looks like >. Enter "?" for help. If you use the g command to send straight gcode, type control-right-square-bracket and then c to get back to the > prompt.
Adjust the platen, so its co-planer with the extruder
Type "c2"
Did it make horrible noises? Stop now.
Take the gauge block (it looks suspiciously like a heat sink) and put it between the platen and the flange on the extruder (the flange does get hot). Adjust the height of the extruder (by typing u and d, to move it Up and Down, and twisting the timing belt pulley on the Z axis for fine adjustments) so the gauge block is just touching the flange. Up and Down are defined relative to the extruder. Up increases the height of the extruder above the platen.
Type "c3"
Did it make horrible noises? Stop now.
Take the gauge block, and put it under the flange again. BUT this time adjust the height of the platen instead of the extruder, using the nut on the end of the threaded rod which is right beside the C3 label.
Type "c4" (detect a pattern here?)
If you've made it this far, it shouldn't make any horrible noises. But if it does, Stop.
Repeat like at c3, only use the nut between C1 and C4. Note that there are three nuts, not four. Only takes three points to define a plane.
Type "c1"
Now you're back at the start.
Double-check the height of the extruder with the gauge block, but it should be OK.
Repeat as necessary.
Load the Gcode, and fine-adjust the Z
type "c"
Now you're in the center (and at Z coord 7).
type "f" and give it your gcode filename at the prompt.
This MUST be done at c.
The extruder MUST also be warmed up.
type "z"
The extruder will drop down to Z=0, and extrude a square. (the square is the bounding box of the obeject, so now you know where it'll be printing it). Tweek the Z axis by twisting the pulley, until the plastic is mushed down onto the platen "right".
Scrape off the plastic, and repeat until you're satisfied.
And the monkey presses the button
Cross your fingers and type "t"
If the gcode just isn't working out, hit ^c a few times. Commands are buffered, so it won't stop immediately.
If there are mechanical issues, unplug the power cord.
And don't forget to unroll more reprap-chow as it goes. It must be unrolled, not pulled off the side, or it will miss-feed.
Eventually it'll finish, pull the extruder out of the way and turn it off. Exit from the reprap.kerm script with control-c. If you wish to make another object, you will need to start over with reseting the ardoweenie.
Maintenance
The X axis is the "inner most" one. The Y axis then moves the X axis back and forth. The Z axis should be obvious... The reprap tends to shed parts as it runs. Don't leave it unattended.
To recompile the firmware
cd /usr/home/norbert/reprap/arduino-0017
./arduino
load the file
/usr/home/norbert/reprap/subversion/reprap/trunk/reprap/firmware/FiveD_GCode/FiveD_GCode_Interpreter/FiveD_GCode_Interpreter.pde
There is no good way to just type filenames... :-P
Make sure Tools->Board->Sanguino is selected.
Struggle through the horrible editor...
Push the upload button. The compile might succeed, but the upload will fail, don't worry about it. Instead run the flashit script:
cd /usr/home/norbert/reprap/subversion/reprap/trunk/reprap/firmware/FiveD_GCode/FiveD_GCode_Interpreter
./flashit
Just before you press return (running the flashit script) hit the reset button on the ardoweenie. It will complain about the expected signature being wrong it does that because I incorrectly flashed it a very long time ago, and have been unable to correct/getaroundtocorrecting the signature.
Retry until it succeeds...
If the extruder doesn't extrude
First, is it warmed up? Make sure it is before trying to run it.
If you missed that part:
The extruder pinches the reprap-chow between a gear and a pinch wheel. If the motor is run before the extruder is warmed up, the gear will "strip" the plastic, and cease to go forward. To address that problem, make sure the extruder is warmed up, and then twist the reprap-chow where its going into the extruder, so the gear gets to chew on an undamaged area. It will then start moving again, and you can let go of the plastic.
Local Modifications
We doused all the sliding rods with 3 in one oil, and polished them with a scrunge.
X axis belt tensioner
We cable-tied the end of the timing belt to a bolt, then passed that bolt through the side of the carriage, and tightened nuts to tension the belt. Slack==Lash You can /see/ the belt bounce when the motor reverses direction.
http://www.bobdbob.com/~tjohnson/lab/20100706/thumbs/meddscn6017.jpg.jpg
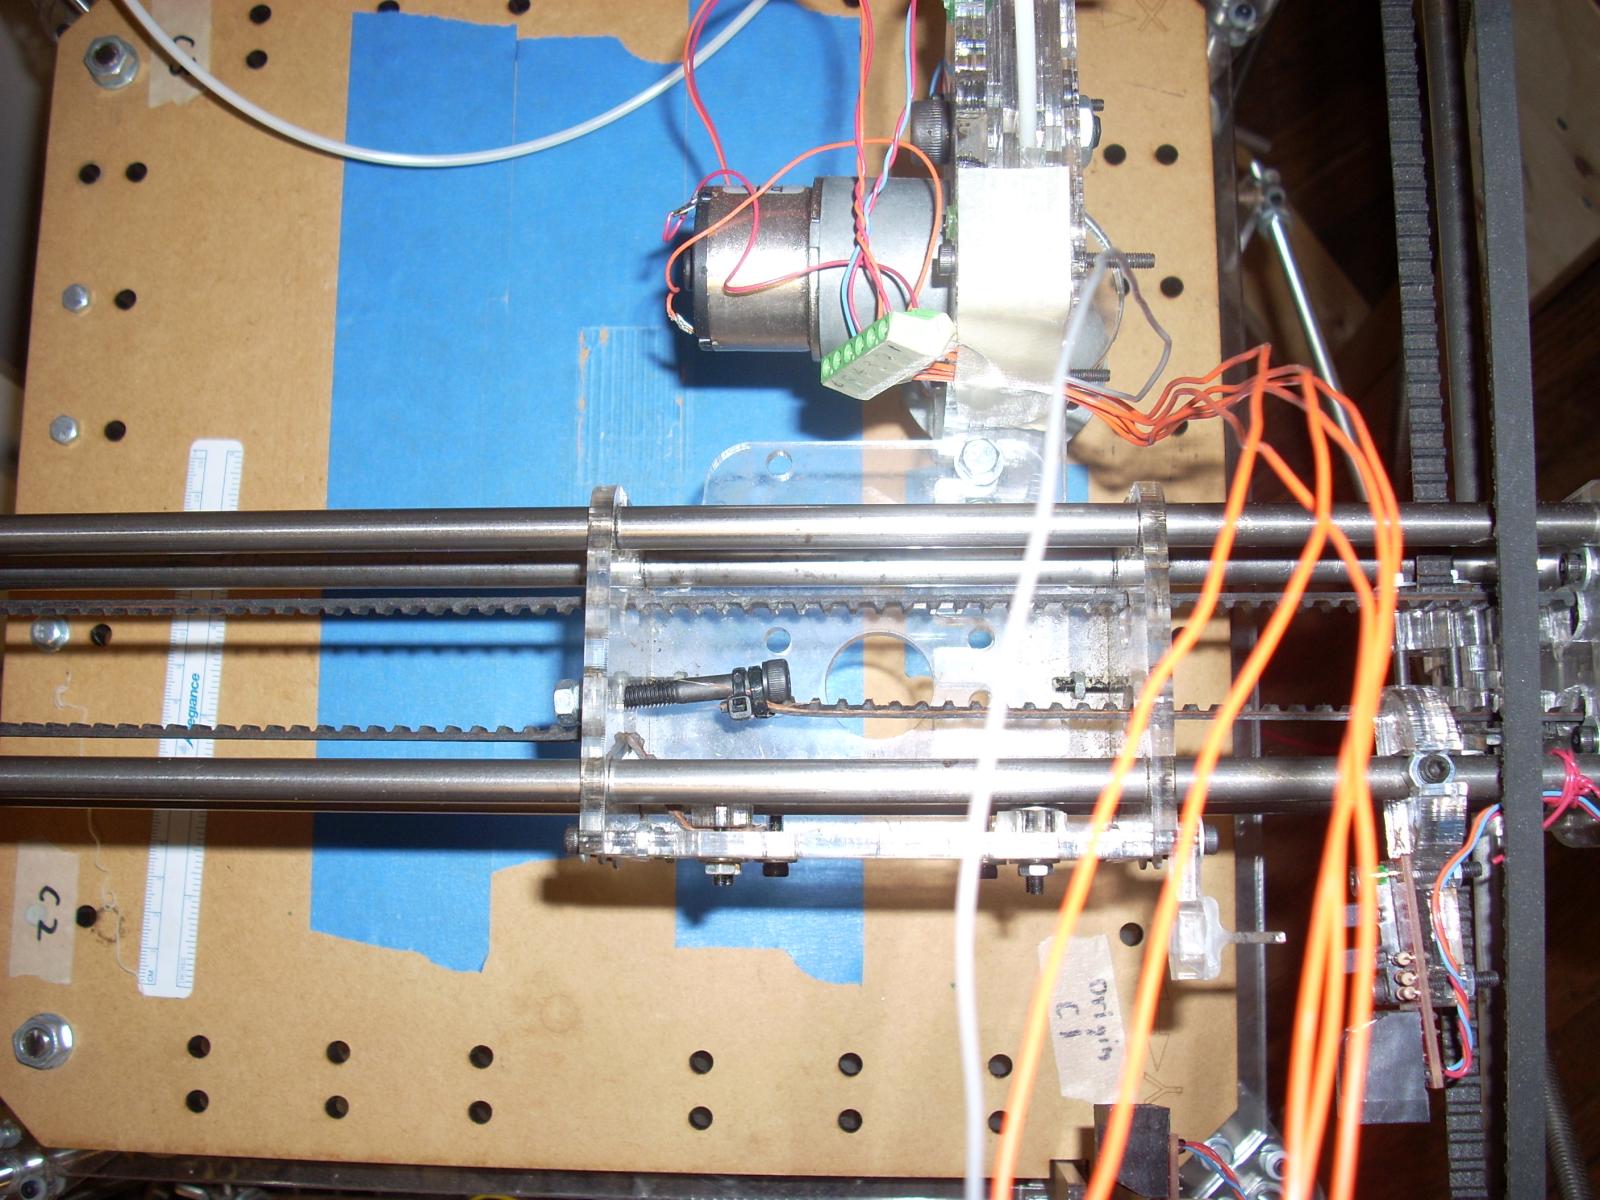
X axis replacement pulleys
We also enlarged the slots the timing belt passes through. Every once in a while, slack in the belt and vibration would allow the teeth of the belt to catch on the edge of the slot. When that happened the motor stalled, and the datum is lost.
http://www.bobdbob.com/~tjohnson/lab/20100706/thumbs/meddscn6015.jpg.jpg
Y Axis belt tensioner
Lever contraption, with a spring, to tension the belt on the inside, as opposed to a pulley pressing on the back of the belt. That is apparently extremely sub-optimal.
http://www.bobdbob.com/~tjohnson/lab/20100706/thumbs/meddscn6022.jpg.jpg
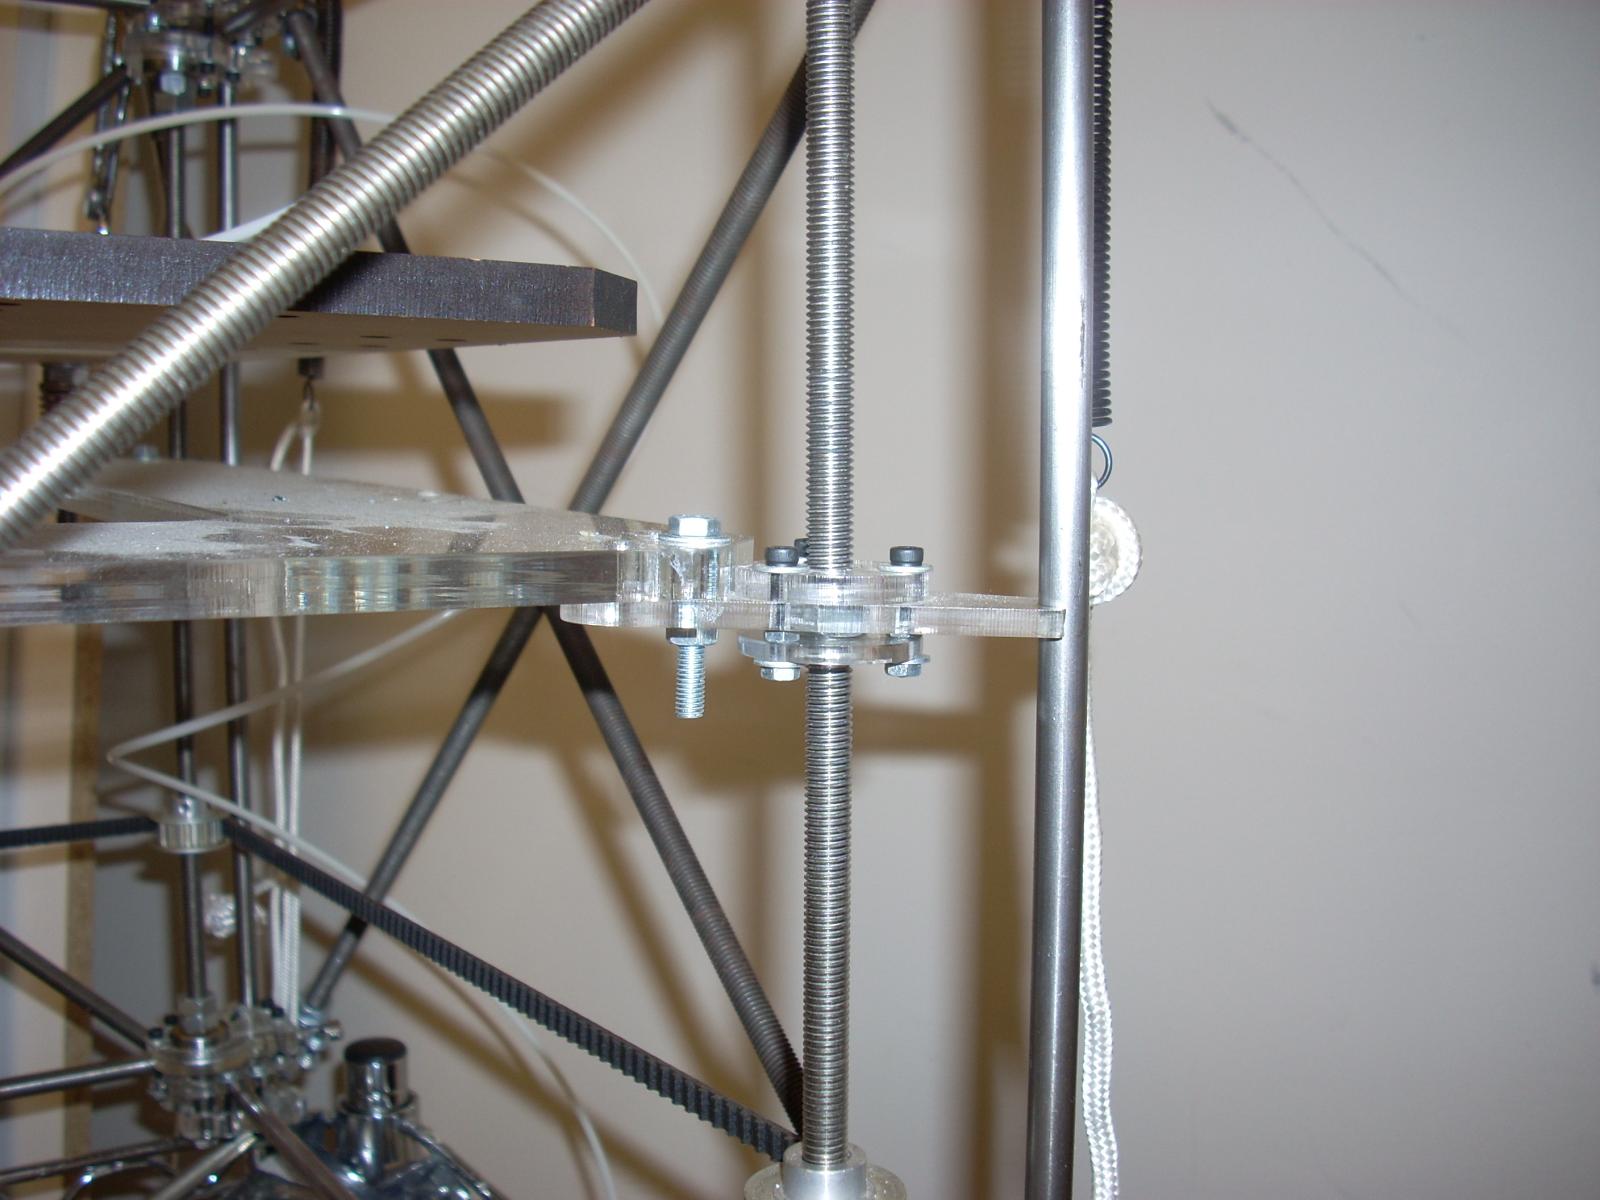
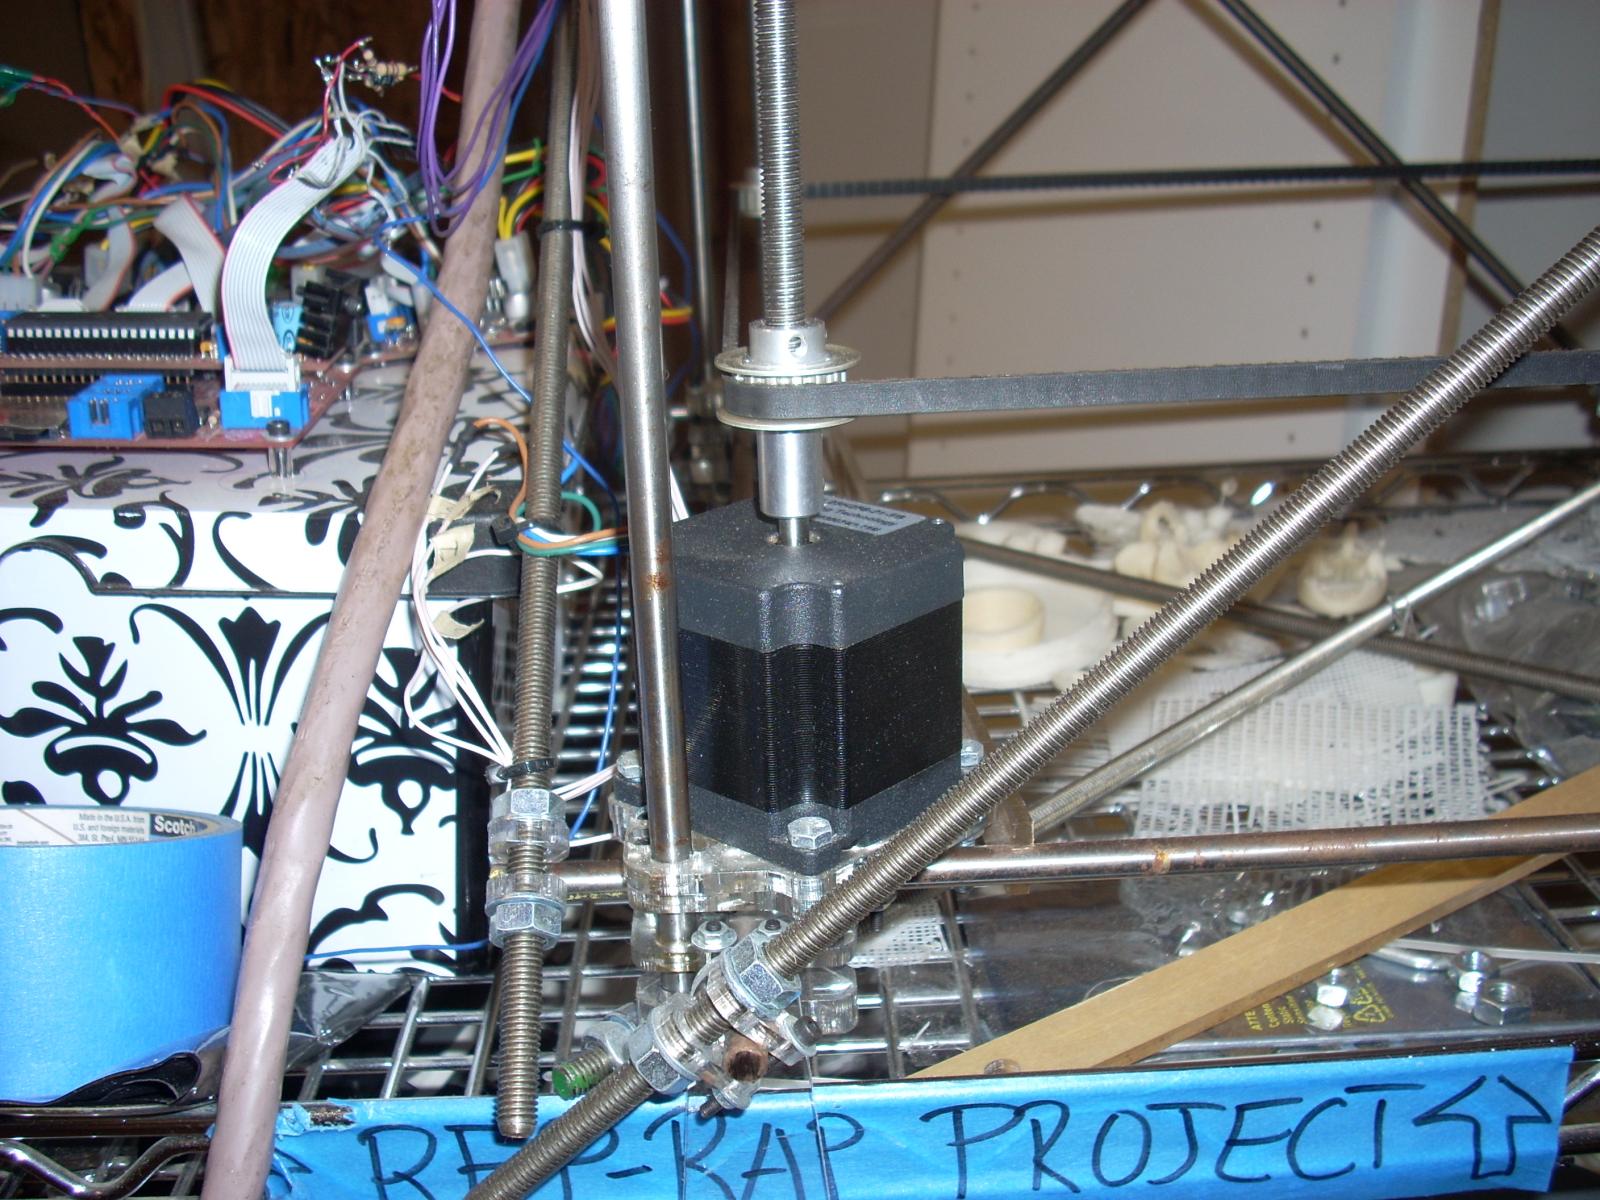
Z axis
We removed a bunch of parts to reduce jambing, and then added retaining rings to fix the Z axis traveling nuts, instead of just sitting on them and hoping gravity is sufficient. (Its not...)
http://www.bobdbob.com/~tjohnson/lab/20100706/thumbs/meddscn6010.jpg.jpg
We also got a proper shaft coupler for the motor to threaded rod connection. We put the threaded rod in a drill, put a bearing around it, held the bearing with a vise and pressed a file against the rod while running the drill, to cut the threaded rod down enough to fit into the coupler. Poor-man's-Lathe. The pulley on top of the coupler is attached to the threaded rod with a set screw.
http://www.bobdbob.com/~tjohnson/lab/20100706/thumbs/meddscn6021.jpg.jpg
Extruder cantilever reinforcement
We cemented an extra piece of plexiglass onto the bottom of the extruder's cantilever, making it significantly more rigid.
http://www.bobdbob.com/~tjohnson/lab/20100706/thumbs/meddscn6011.jpg.jpg
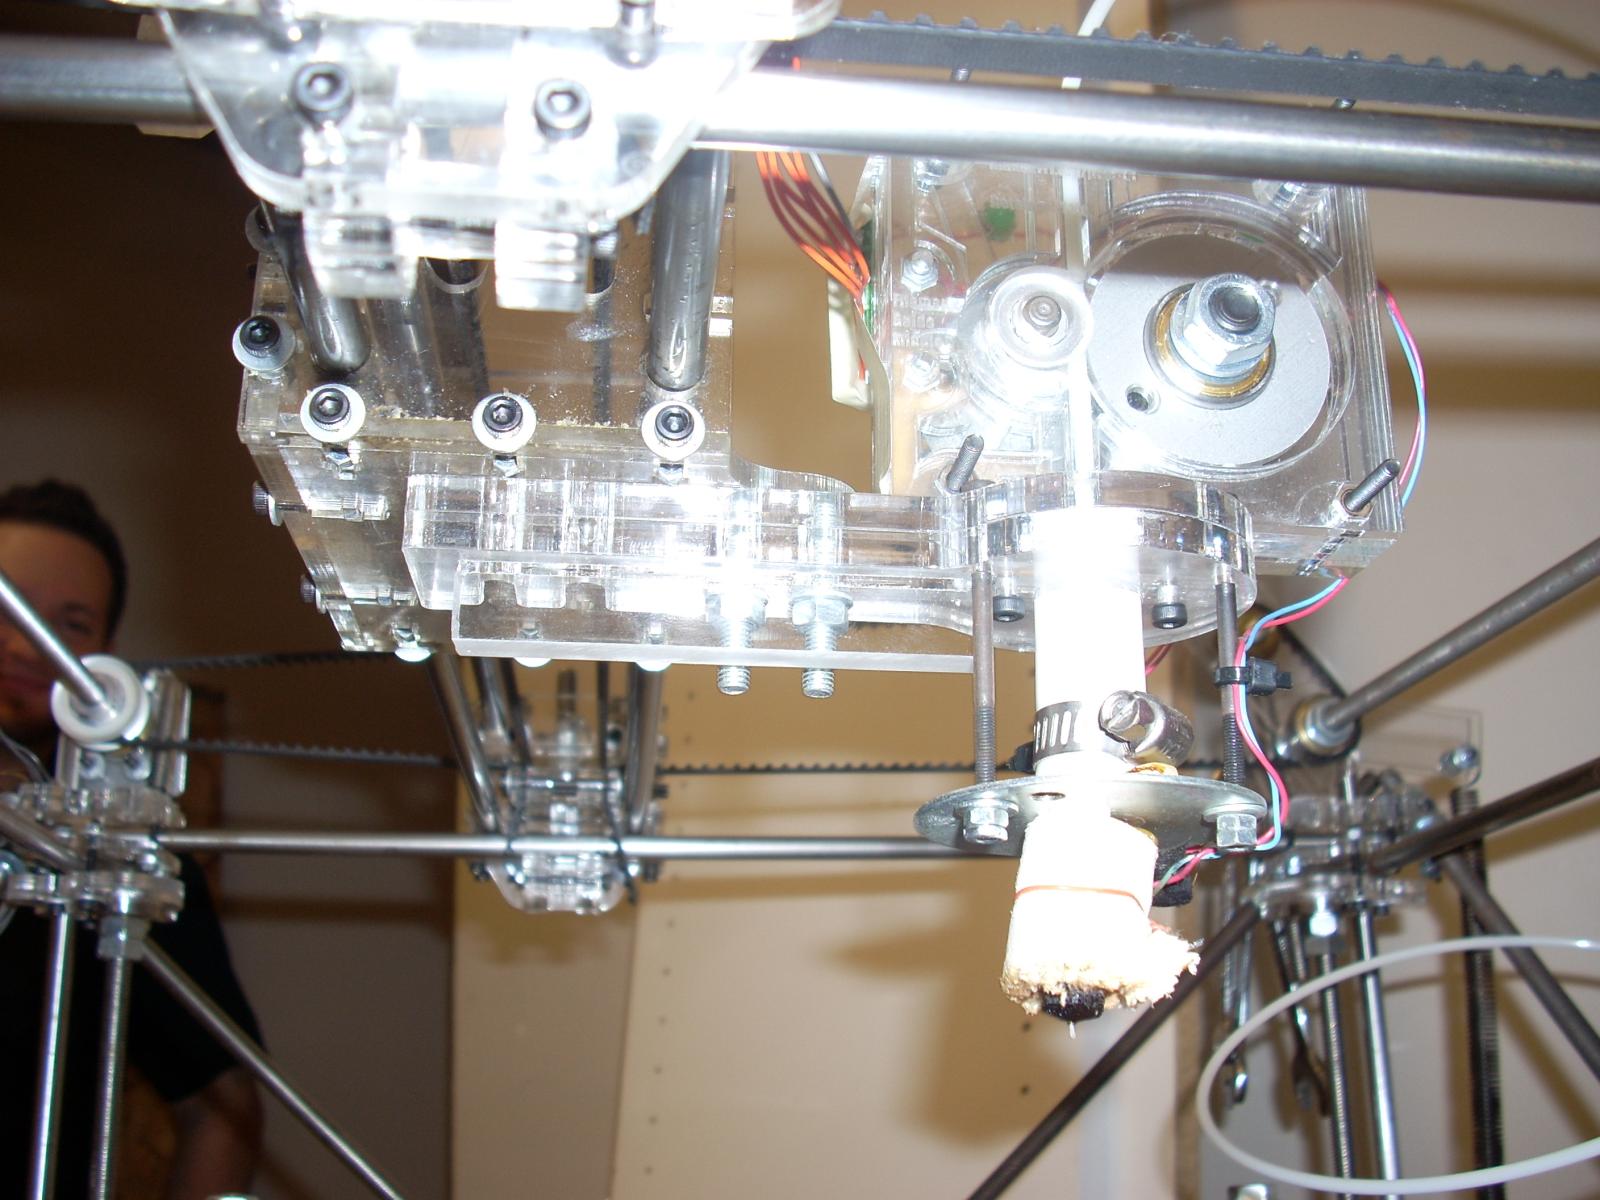
The extruder pinch wheel was also replaced with aluminum. It makes a quiet squeaking noise as it runs.
Copyright Note: The images on www.bobdbob.com I specifically cite in this page are released under the Attribution-Noncommercial 3.0 Unported (like this page), but the other content of that site is not. I'll be moving those images over to hacdc machines as soon as I determine /how/ to.