CNC Mill: Difference between revisions
From HacDC Wiki
No edit summary |
(added missing spaces) |
||
| (8 intermediate revisions by 2 users not shown) | |||
| Line 5: | Line 5: | ||
=Quickstart= | =Quickstart= | ||
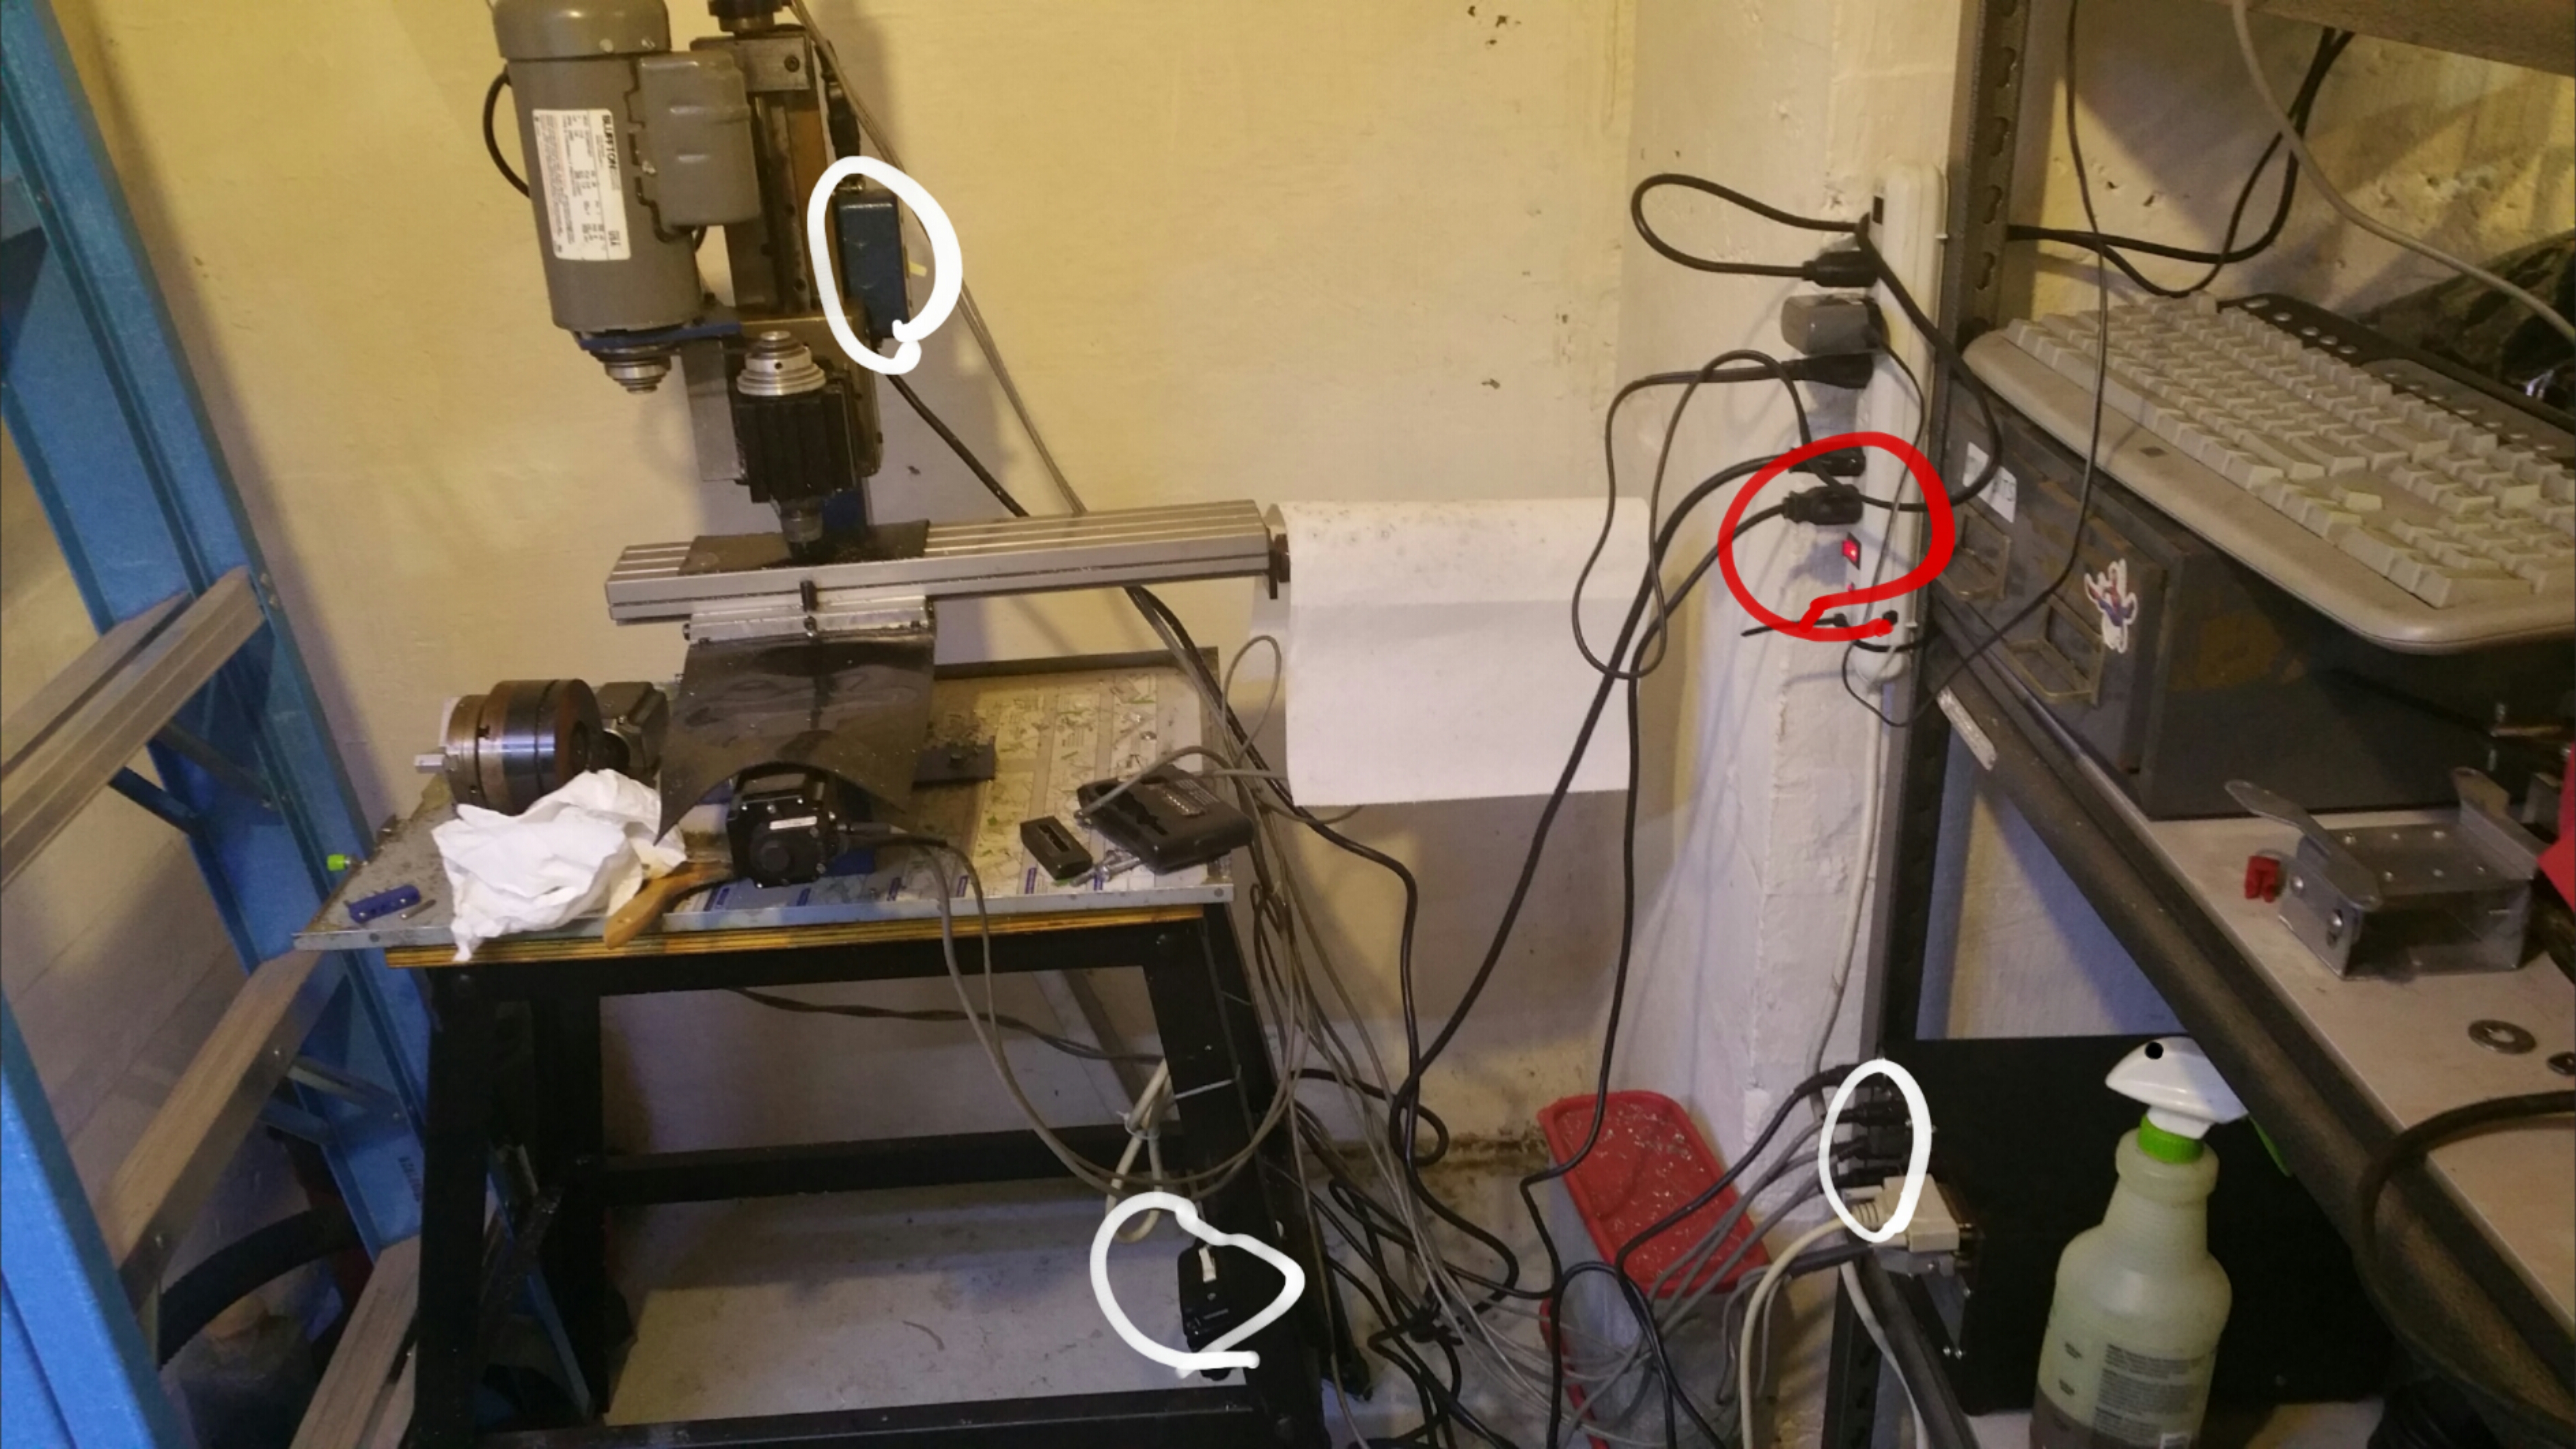
# | # Ensure that the switches circled in white in the image to the right are in the off position, then turn on the killswitch (Circled in red), and turn on the dedicated desktop computer. Mach3 is available under MS Windows. | ||
# Turn on all three lightswitches: back of the "MicroProto Systems, MicroMill DSLS 3000" box, top of the M3/M5 box, and to the side of the mill spindle. | # Turn on all three lightswitches: back of the "MicroProto Systems, MicroMill DSLS 3000" box, top of the M3/M5 box, and to the side of the mill spindle. | ||
# "Tab" key brings up the jog controls. | # Double click the desktop shortcut "CNC_mill" to open software. "Tab" key brings up the jog controls. | ||
## You may have to hit reset button before the manual controls will work | |||
# MDI tab in Mach3 allows manual G-Code entry. This is useful for commanding the mill to specific locations (eg. g0 x0 y0 z5) . | # MDI tab in Mach3 allows manual G-Code entry. This is useful for commanding the mill to specific locations (eg. g0 x0 y0 z5) . | ||
# Gently change mill bits with crescent wrenches. Finger tight is often sufficient. | # Gently change mill bits with crescent wrenches. Finger tight is often sufficient. | ||
If, for some reason, you need to turn off the CNC mill while it's milling, please use the killswitch. It was added to eliminate the need to stick one's hand in hazardous places. | |||
=Cleanup= | =Cleanup= | ||
# Turn off all three power switches noted above. | # Turn off all three power switches noted above. | ||
# | # Shut down dedicated computer. | ||
# Please | # Please clean up the mill area and place tooling back into the mill toolbox under the bench. | ||
=Please Avoid= | =Please Avoid= | ||
Latest revision as of 03:02, 11 April 2018
Quickstart
- Ensure that the switches circled in white in the image to the right are in the off position, then turn on the killswitch (Circled in red), and turn on the dedicated desktop computer. Mach3 is available under MS Windows.
- Turn on all three lightswitches: back of the "MicroProto Systems, MicroMill DSLS 3000" box, top of the M3/M5 box, and to the side of the mill spindle.
- Double click the desktop shortcut "CNC_mill" to open software. "Tab" key brings up the jog controls.
- You may have to hit reset button before the manual controls will work
- MDI tab in Mach3 allows manual G-Code entry. This is useful for commanding the mill to specific locations (eg. g0 x0 y0 z5) .
- Gently change mill bits with crescent wrenches. Finger tight is often sufficient.
If, for some reason, you need to turn off the CNC mill while it's milling, please use the killswitch. It was added to eliminate the need to stick one's hand in hazardous places.
Cleanup
- Turn off all three power switches noted above.
- Shut down dedicated computer.
- Please clean up the mill area and place tooling back into the mill toolbox under the bench.
Please Avoid
- Obviously, don't put your hands in hazardous places.
- Stay with the mill unless you really know what _all_ the risks are. Strange things can happen, particularly "dig-in" and g-code misinterpretation.
- Milling the mill itself (or our mounting hardware) is easily possible, and a rather expensive mistake.
- Use G91.1 with certain automatically generated G-Code files (eg. pcb2gcode, solidcam). Mach3 seems to default to absolute arc/circle center coordinates which catastrophically enlarges the arcs/circles.
Otherwise, the mill is robust and newbie friendly.
Pages in category "CNC Mill"
The following 4 pages are in this category, out of 4 total.


